 In the last experiment I wired up LEDs to each one of the PiFace’s outputs and cycled through them. In this one, I decided to try a slightly more “real world” application, and build a set of traffic lights.
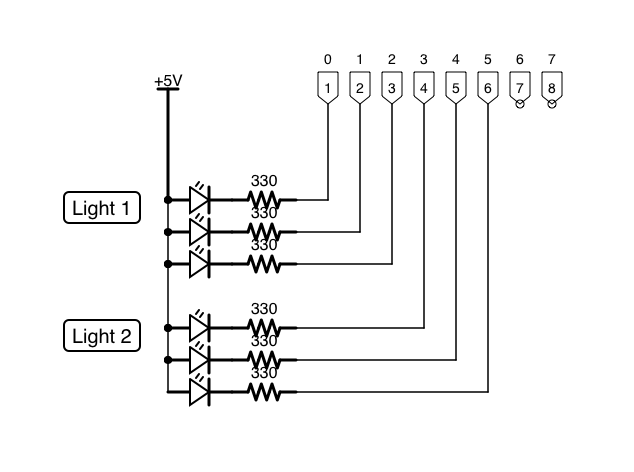
Since I live in the UK, these are the UK three light traffic lights (red/amber/green) and follow the UK light sequence – RED, RED/AMBER, GREEN, GREEN, AMBER, RED.
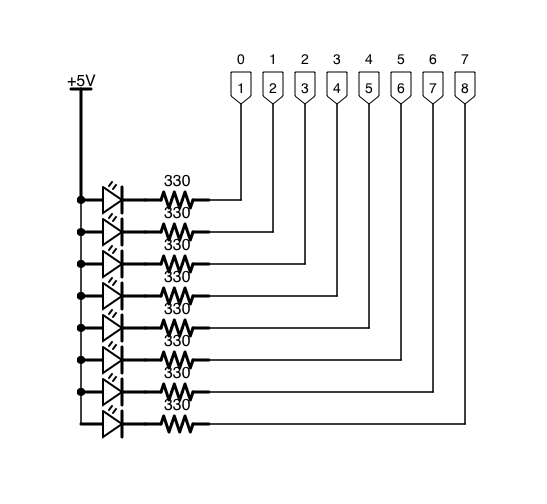
The Circuit
The circuit here is very similar to the one used for the previous experiment, but will only use six of the available eight control outputs. Each light contains a set of three LEDs connected to one of the pins of the PiFace’s output interface, one red, one amber and one green.
See the attached diagram.
The Software
The code for this experiment is where the extra complexity resides, since we must drive each light in the correct sequence and obeying certain rules:
- The lights must transition in the correct, UK, sequence, i.e. RED, RED/AMBER, GREEN, and then GREEN, AMBER, RED.
- For traffic safety, the green light must transition to red before the red light transitions to green.
To avoid repeating myself, I created a simple class to drive the lights.
Each class is initialised with the pin number of each light, and an initial status. The Toggle method will transition the light; RED, RED/AMBER, GREEN if status is RED, and GREEN, AMBER, RED if status is GREEN.
The main loop of the program waits for a period of time, then toggles the lights, starting with the green one.
Here we have it in action…
 So, a few weeks ago I got a