• Home
  • Consultancy
  • Contact
  • Loosely coupled Elgg extensions (Captcha example)

    June 15th, 2009 by Marcus Povey

    A new CAPTCHA approachOne thing we try and do when working on a new Elgg feature is – where we can – couple things together as loosely as possible and provide hooks for third party developers to extend Elgg and fill in any blanks.

    A good example of where this has been done is the newly introduced Captcha functionality available in the latest nightly testing builds of Elgg.

    The Captcha functionality is provided by a module which extends a view called “input/captcha“. This view is blank by default but is used in several places such as user registration and the lost password form.

    This means two things; firstly that if a Captcha module isn’t installed or enabled then forms behave normally, and secondly it becomes a trivial matter for third party modules to provide their own Captcha functionality.

    This same mechanism is how the URL shortener module works by the way.

    Next, the Captcha module extends a number of actions to require a correctly validated Captcha code. This list itself is the product of a plugin hook which returns an array of actions which require Captcha validation:

    $actions = array();
    $actions = trigger_plugin_hook('actionlist', 'captcha', null, $actions);

    ...

    function captcha_actionlist_hook($hook, $entity_type, $returnvalue, $params)
    {
    if (!is_array($returnvalue))
    $returnvalue = array();

    $returnvalue[] = 'register';
    $returnvalue[] = 'user/requestnewpassword';

    return $returnvalue;
    }

    The reason why the list of actions is provided this way is twofold, firstly it lets modules use Captcha functionality in their own code through a generic interface, and secondly it is harder to spoof than looking for some marker in the form code.

    The Captcha itself injects a server generated token into the form, which together with the user’s response to the characters generated in an image are used to validate that the user is indeed human.

    As we can see, Elgg asks to be provided with a Captcha if one is available by including a specific view, but is agnostic as to where (or indeed if) this functionality is supplied.

    By using the techniques available to an Elgg programmer I was able to loosely couple the Captcha system to Elgg in such a way that a third party can easily use the same techniques to provide a more advanced module.

    Happy coding!

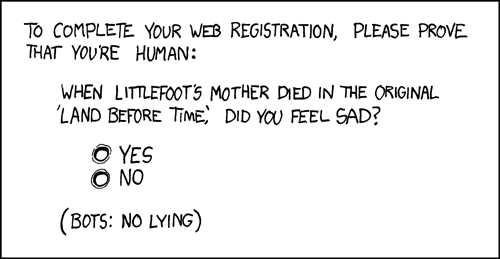
    Image “A new Captcha approach” by XKCD

    All about themes

    September 15th, 2008 by Marcus Povey

    Themes for Elgg are both extremely easy to develop and incredibly powerful. Using themes you can completely change how an Elgg install looks and feels (and even behaves).

    Since there has been a fair amount of discussion of themes on the groups, I thought it would be a good idea to write a brief post about it.

    Themes use two key Elgg concepts – namely, the plugin architecture and the views system.

    By far the easiest and flexible way to make a theme for Elgg is to build it as a plugin. This makes it easy to distribute (since they are self contained) and lets you turn the theme on and off from the admin panel (making the theming process far less invasive!)

    What you must first do is create a new plugin directory under /mod (documented here). In a nutshell; create a directory in the name of your theme, a new start.php and a new manifest.xml.

    Once you’ve done this you then can start modifying views. This can be done either by extension or by view overriding.

    View extension
    The first way is to add extra stuff to an existing view via the extend view function from within your start.php’s initialisation function.

    For example, the following start.php will add mytheme/spotlight to the already existing site spotlight:

    <?php

    function mytheme_init()
    {
    extend_view('page_elements/spotlight','mytheme/spotlight');
    }

    register_elgg_event_handler('init','system','mytheme_init');

    ?>

    View overriding
    The next method is to override an existing theme, completely replacing it with the one provided by your plugin.

    View files provided by plugins automatically take precedence over views from the core. So all we have to do to entirely replace the existing spotlight is to create a new spotlight.php in the appropriate hierarchy.

    So, if the original view is stored in:

    /elgg/views/default/page_elements/spotlight.php

    We need to create the file:

    /elgg/mod/mytheme/views/default/page_elements/spotlight.php

    Now, when we go to the admin panel and activate our theme the spotlight will be replaced by whatever you put in that file. Simple eh?

    You can of course do this with any view.

    Using a combination of these methods means you can replace the entire look and feel of a site very quickly indeed, although I would suggest that you start slowly since many views do some quite complicated things.

    Import and Export in Elgg 1.0

    July 31st, 2008 by Marcus Povey

    Perhaps one of the most useful and unique features about Elgg 1.0 is its ability to import and export data. Initially this is accomplished via OpenDD, but we have added hooks which make it very easy to add other formats.

    I’m going to talk a little bit about how this works. Firstly, Export.

    Export works via the views system, and involves creating a brand new view hierarchy for your new format.

    We first need to create a plugin, and in this plugin we create a “views” directory. We need to then create a new directory for your format, and then create a couple of views underneath.

    The image to the left shows the necessary file hierarchy that you need to create – in this instance to export “myformat”.

    Create a directory called “export”. In this directory place the three php files – entity.php, metadata.php and relationship.php – which handle entities, metadata (and annotations) and relationships respectively.

    Each of these files are passed objects via $vars. Depending on which file you are in, this might be $vars['entity'], $vars['metadata'] or $vars['relationship'].

    It is then up to you to encode and output the object according to your format.

    All that remains is to provide the pageshell which handles how the overall page is displayed. This file may set the content-type header or provide wrapping tags (e.g. for XML output).

    pageshell.php is passed $vars['body'] containing the output of your other files.

    Providing a handler to deal with importing data is also fairly simple, and works through the action interface.

    In your plugin’s init function register the action “import/YOURFORMAT”, and point it to your actions/import/myformat.php, e.g.

    <?php
    
    	function myformatplugin_init()
    	{
    		global $CONFIG;
    
    		// Register import action
    		register_action('import/myformat', false,
    		  $CONFIG->pluginspath . "myformatplugin_init/actions/import/myformat.php");
    	}
    
    	// Initialise
    	register_elgg_event_handler('init','system','myformatplugin_init');
    ?>

    This will then register an import action which will be picked up by the administrator import export utility. Your action can access the information it needs to import with the call:

    $data = get_input('data');

    Elgg 1.0 will ship with native support for OpenDD (both import and export) which will allow administrators to migrate between Elgg classic and the new codebase with a minimum amount of effort.

    Elgg 1.0 also offers export views in JSON and PHP native, making it easier to reference the data directly and create mashups.

    Over time we will be adding more import and export functionality, and I hope you will be too!

    Plugin settings on Elgg 1

    June 20th, 2008 by Marcus Povey

    Whew, well it’s been a monumentally busy development week on the new Elgg 1.0 codebase. The whole team has been working hard putting things together, and I’ve written so much cool stuff its hard to know where to begin.

    Much of the really cool stuff I’ve been working on has been under the hood (XML-RPC, PAM, API etc), but I’ll start with giving a brief summary of what I was working on today – plugin administration.

    As with Elgg Classic, Elgg 1 supports plugins modules. However, these modules can be turned on and off by the administrator (in much the same way as wordpress plugins can be). They can also have settings edited.

    There are two things as a plugin writer to do to take full advantage of this:

    Manifests

    Manifests tell Elgg a little bit about your plugin. Your plugin will still work without them, but I highly recommend you use them.

    Simply create a file called manifest.xml in your plugin’s top level directory that looks something like this:

    <?xml version="1.0" encoding="UTF-8"?>
    <plugin_manifest>
    <field key="author" value="Marcus Povey" />
    <field key="version" value="1.0" />
    <field key="description" value="My first plugin!" />
    <field key="website" value="http://www.marcus-povey.co.uk/" />
    <field key="copyright" value="(C) MyCorp 2008" />
    <field key="licence" value="GNU Public License version 2" />
    </plugin_manifest>

    Per-plugin settings

    These let you provide some admin controlled configuration options for your plugin. Adding these is relatively simple.

    1. Create a file in your plugin’s view folder called settings/PLUGINNAME/edit.php, where PLUGINNAME is the name of your plugin’s directory in the mod hierarchy.
    2. Fill this file with the form elements you want to display together with internationalised text labels. Note: you don’t need to add a save button or the form, this will be handled by the framework.
    3. Set the name attribute in your form components to param[VARNAME] where VARNAME is the name of the variable. These will be saved as metadata attached to a plugin entity. So, if your variable is called param[myparameter] your entity (which is also passed to this view as $vars['entity']) will be called $vars['entity']->myparameter.

    Here is an example of this view:

    <p>
    <?php echo elgg_echo('myplugin:settings:limit'); ?>

    <select name="params[limit]">
    <option value="5" <?php if ($vars['entity']->limit == 5) echo " selected=\"yes\" "; ?>>5</option>
    <option value="8" <?php if ((!$vars['entity']->limit) || ($vars['entity']->limit == 8)) echo " selected=\"yes\" "; ?>>8</option>
    <option value="12" <?php if ($vars['entity']->limit == 12) echo " selected=\"yes\" "; ?>>12</option>
    <option value="15" <?php if ($vars['entity']->limit == 15) echo " selected=\"yes\" "; ?>>15</option>
    </select>
    </p>

    Fun! fun!

    All content is © Copyright Marcus Povey 2008-2010 and released under a Creative Commons licence unless otherwise stated.

    Creative Commons License